
Nudify Guide (Stable Diffusion)
Installation
Install Python 3.10.6 (ticking Add to PATH), and git
Open Command Prompt from search bar, and type
git clone https://github.com/AUTOMATIC1111/stable-diffusion-webuiDouble click
webui-user.bat
Model
Download Uber Realistic Porn Merge (URPM) and config file
Place the model and config file inside the models/Stable-diffusion directory of your AUTOMATIC1111 Web UI instance
Refresh your model list or restart the Stable Diffusion Web UI
Select the custom model from the Stable Diffusion checkpoint input field
Usage
Click on
img2imgtab and thenInpainttab- FieldValue
Prompt
photo of a nude woman, naked
Negative prompt
((clothing), (monochrome:1.3), (deformed, distorted, disfigured:1.3), (hair), jeans, tattoo, wet, water, clothing, shadow, 3d render, cartoon, ((blurry)), duplicate, ((duplicate body parts)), (disfigured), (poorly drawn), ((missing limbs)), logo, signature, text, words, low res, boring, artifacts, bad art, gross, ugly, poor quality, low quality, poorly drawn, bad anatomy, wrong anatomy
Resize mode
Just resize
Mask blur
4
Mask mode
Inpaint masked
Inpaint area
Only masked
Only masked padding, pixels
32
Sampling method
DPM++ SDE Karras
Sampling steps
20
Restore faces
Unchecked
Tiling
Unchecked
Width
512
Batch count
1
Height
512
Batch size
1
CFG scale
7
Denoising strength
0.75
Seed
-1
Extra
Unchecked
Script
None
Select the picture and draw a mask over the part which needs to be nudified. It should look something like this:
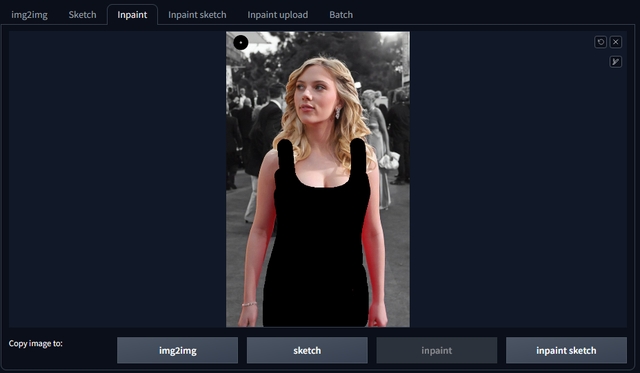
Masking Click on
Generate
Last updated